

THERE’S NO BEST METHOD
The use of masks or selections play a very important role in every photo if you aim to control every aspect of your photo in the creative editing phase.
Over the years I’ve written several tutorials on creating selections and how to manage them as channel masks, I’ve even created a masking panel called Quick Mask Pro based on a masking technique I developed myself and that is called Multiple Channel Masking with Gradients, which basically is a more advanced version of the well known method called Channel Masking and I’ve done a multitude of video tutorials on how to use the panel.
I’m not going to explain Multiple Channel Masking with Gradients here, as it is almost impossible to explain it in writing. For now, I only teach my students this masking technique, and even then it requires several sessions to cover it. But I might attempt a video tutorial in the future.
But I believe there’s a need to say a bit about how those masking techniques relate to each other and which is the best. Well, I can already answer the latter: there is no ‘best method’. That is nonsense. It all depends on the photo, the available contrasts, available colors, what areas or objects need to be masked and what you want to use the masks for.
There is a ‘best method’ for a very specific photograph with a very specific purpose, but there’s no best method in general. If there’s something like the best method then it is the following:
The method of knowing what methods there are, how to use and how to combine them effectively together in the right situation. Saying for example that channel masking with dodge and burn is better than any other method is a naive assertion when you have perfect colors in your photo and no contrast.
We don’t live in a perfect world, and the same applies to photography: there’s no perfect photo. Therefore, you can’t rely on just one method.
In this article, I’ll give an overview of available Photoshop masking methods, types of masks, the difference between masks and selections, when to use them, and a few tips and guidelines for better masking and less frustration. And keep in mind: a smart photographer/artist is someone who also knows when NOT to create selections. If you don’t need them and can solve it in an easier and faster way, then don’t waste your time.
OVERVIEW AVAILABLE MASKING TUTORIALS
For those of you who aren’t familiar with my masking tutorials and need to know more, here’s a list of hands-on, step-by-step guides, that are already available on my website on the creation of selections and masks.
NOTE: these are older tutorials dating back 7 years for the oldest, and therefore the terminology I suggest using in this post when talking about masks/selections, is different than the one used in the older tutorials. Also, my recommendation these days would be different but they’re still very useful and technically correct guides to get a better understanding.
0. Intro: managing and saving selections
1. Part 1 on creating selections
2. Part 2 advanced selection methods
Masks vs Selections
First a short explanation on types of masks and selections and how exactly they relate to each other.
A selection is a selected object (or light) in an image, usually visually indicated by marching ants, but not always visible when we deal with intersected luminosity masks for example.
A mask is a saved selection, but I have to be more accurate: a channel mask is a saved selection in an alpha channel that can be found under the ‘Channels Panel’ in Photoshop. There are also layer masks and a layer mask is a different kind of mask, only used in a layer when editing a photo under the ‘Layer panel’ in Photoshop.
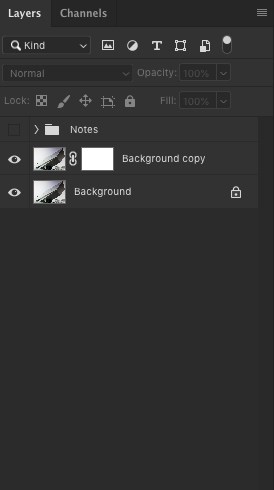

Layer masks, for editing, are not the same as the channel masks, for creating masks, that we’re talking about now in this article. For the sake of clarity, I’ll keep saying channel mask to denote I’m talking about the saved selection.
There are 2 types of channel masks stored in alpha channels under ‘Channels panel’:
1. Hard channel masks or hard selections (again, the loaded version of the channel mask) that only consist of pure white and black areas. White indicating a selected area and black indicating the area that is not selected. In other words: white reveals, black conceals.
2. Soft channel masks or luminosity masks/selections. The difference with hard channel masks is that a luminosity mask not only has black areas (not selected/concealed) or white areas (selected/revealed) but also every gray tone in between. The darker the gray tone, the more it is concealed, and the lighter the gray tone, the more it is revealed.
Hard selections are usually created and used to isolate, and consequently control, objects, while luminosity mask selections are used and created to isolate and control light. Combine hard with soft selections via intersections and you can isolate light within an object. The reverse is also possible but usually defeats its purpose.
For this reason, if you want to control a photo completely, then one should always aim to create both hard and soft selections. When you isolate objects with hard selections and light with luminosity masks, then essentially you control everything in a photo.

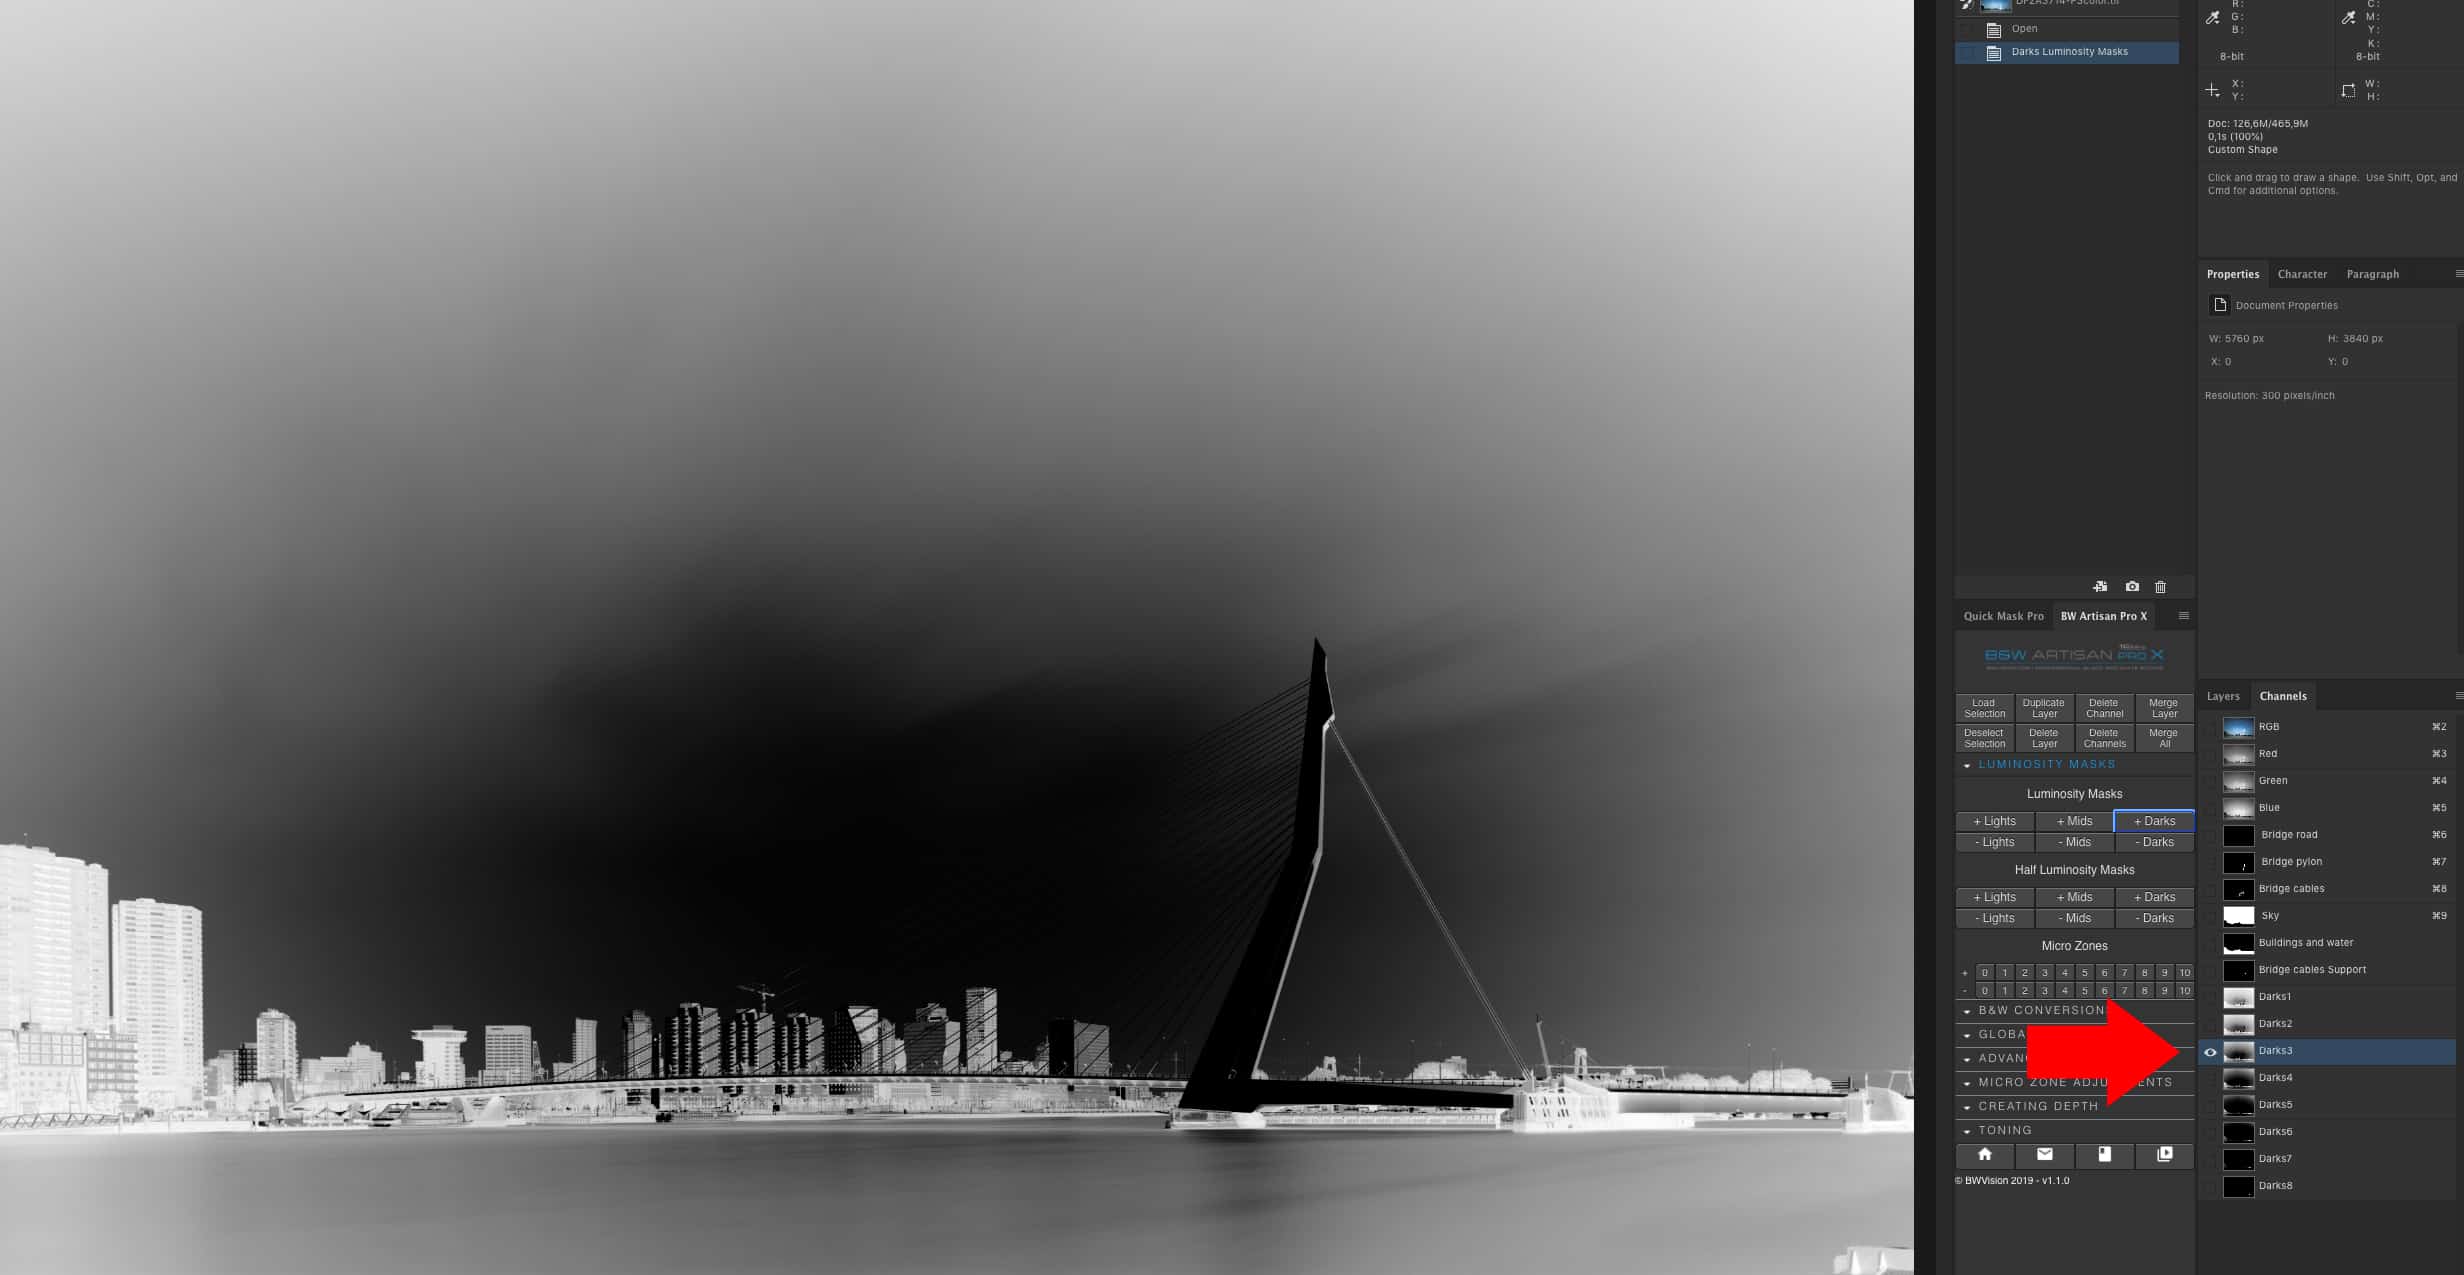
LUMINOSITY MASKS – SOFT MASKS
The links to tutorials in the introduction all mainly refer to creating hard selections. The creation of soft selections or luminosity masks is usually done automatically via panels, that are sometimes free, sometimes paid for panels like Tony Kuypers TK panels or my own panels.
There are many ways of creating luminosity masks manually without a panel as I’ve explained in this article but I would recommend to learn it briefly, if you don’t know how yet, then try it out yourself a few times, just to get a basic understanding, and then, by all means, use a panel to create them automatically, because it is a waste of time to create them manually for every photo, sometimes more than once per photo.
Both my B&W Artisan Pro X panel and Quick Mask Pro panel come with 16-bit luminosity mask presets as a bonus feature. I also have a free version of the Artisan Pro panel that’s called Artisan Lite and also has the basic luminosity masks presets, for free.
And if you prefer action sets then you can get my free luminosity mask action set here
16-BIT vs 8-BIT MASKS – A HARD WIRED INCONSISTENCY
We aim to edit in 16 bits in Photoshop and we should always do so to retain the highest quality. That also implies that channel masks should be created in 16 bits. That applies to both hard channel masks and luminosity masks.
But there’s a hard-wired inconsistency in Photoshop. Selections are always 8 bits. Once you load a 16-bit channel mask as a selection it becomes an 8-bit selection, and therefore virtually eliminating the 16 bits depth of the 16-bit masks. So does it still make sense to create 16-bit masks?
I would always recommend doing so, notwithstanding the fact that the only way you can practically use a mask is by loading it as a selection, which is the degraded version of the channel mask and therefore lower in quality. In some extreme situations where the contrast and adjustments are really pushed hard, you will see a difference between an 8-bit and 16-bit mask, that is loaded as a selection to make a tonal adjustment. Often occurring as banding.
My luminosity mask tutorial is by the way based on creating 8-bit luminosity masks. The creation of 16-bit luminosity masks is a bit different and that is something I aim to explain in the near future. That upcoming article will show you different ways of creating 16-bit masks and also how to create half values and other in-between luminosity masks.
Just remember till then that as soon as you need to load a selection during the creation of the luminosity or hard mask, it will be an 8-bit channel mask. If you don’t use loaded selections during the process of creating masks, but purely work with levels and calculations and other editing tools that don’t require a loaded selection, it will be 16 bits.
MASKING METHODS
There are roughly 3 masking methods with many varieties per method, in order of importance and preference.
1. Contrast based method. This generic method is designed to create masks based on the available contrast in an image. Channel masking, for example, is such a contrast-based method. You select one of the color channels with the highest available contrast around the object you want to mask.
If there’s not enough contrast in your photo then the channel masking method becomes unusable. On average the contrast-based method is the most reliable, accurate and most used method available and it’s practically the only method to mask hair for example.
Personally, I believe that the traditional channel masking method using only 3 channels as the best contrast-based method is surely not correct, knowing you can also use multiple other channels (remember the luminosity masks?) on top of the RGB channels to expand your set of channels to choose from. Besides, if you have a monochromatic RAW file such as from the Leica Monochrom or Phase One achromatic, then the RGB channels are all the same.
I use the Multiple Channel Masking technique myself, combined with gradients in such a specific way, that this method will allow you to create masks where traditional channel masking seems impossible. As stated earlier, I will attempt a tutorial on this in the future, but for now, just remember that you don’t need to limit yourself to the 3 color channels to create hard masks.
2. Color-based technique. The most important example of this is Photoshops Color Range feature. You can only use this method if there are enough unique colors in the object you want to select. Blue skies are a perfect example of this and if you want to select the sky and the sky is blue, then start with this technique.
The problem, however, is that other objects, especially architecture, will contain some blue colors as well. Foliage is another good example to select using the color range feature in Photoshop. Other than that, the practical application is quite limited, not in the least for the fact that unique colors in one area or object are hard to find.
3. Manual method. The best manual method is without a doubt the pen tool in Photoshop. But the manual method is a very time-consuming method and forget about masking hair or other very intricate details like antennas, you simply cannot get it right, and if you attempt masking hair or other intricate details such as branches and leaves of a tree, then you must be masochistic. Still, a very useful tool when all other methods fail.
THE BEST METHOD IS KNOWING HOW TO COMBINE VARIOUS METHODS
So, looking at this classification of masking methods and the order of importance I attributed to it, does it mean the Contrast Based method is the best method?
No, definitely no. It’s first on my list because this has proven to be the method that I use the most and that can be used in most situations where you have enough contrast. It isn’t a better method if you have a photo with enough unique colors in important objects in your image, for example. Try masking foliage with the contrast-based method, instead of with the color based method, it usually doesn’t result in the best and fastest results.
The best method is knowing when to use what method and how to combine them all together and knowing what or what not to mask for each photo! So basically it means you need to have sufficient knowledge and practical experience with using the most important techniques per method.
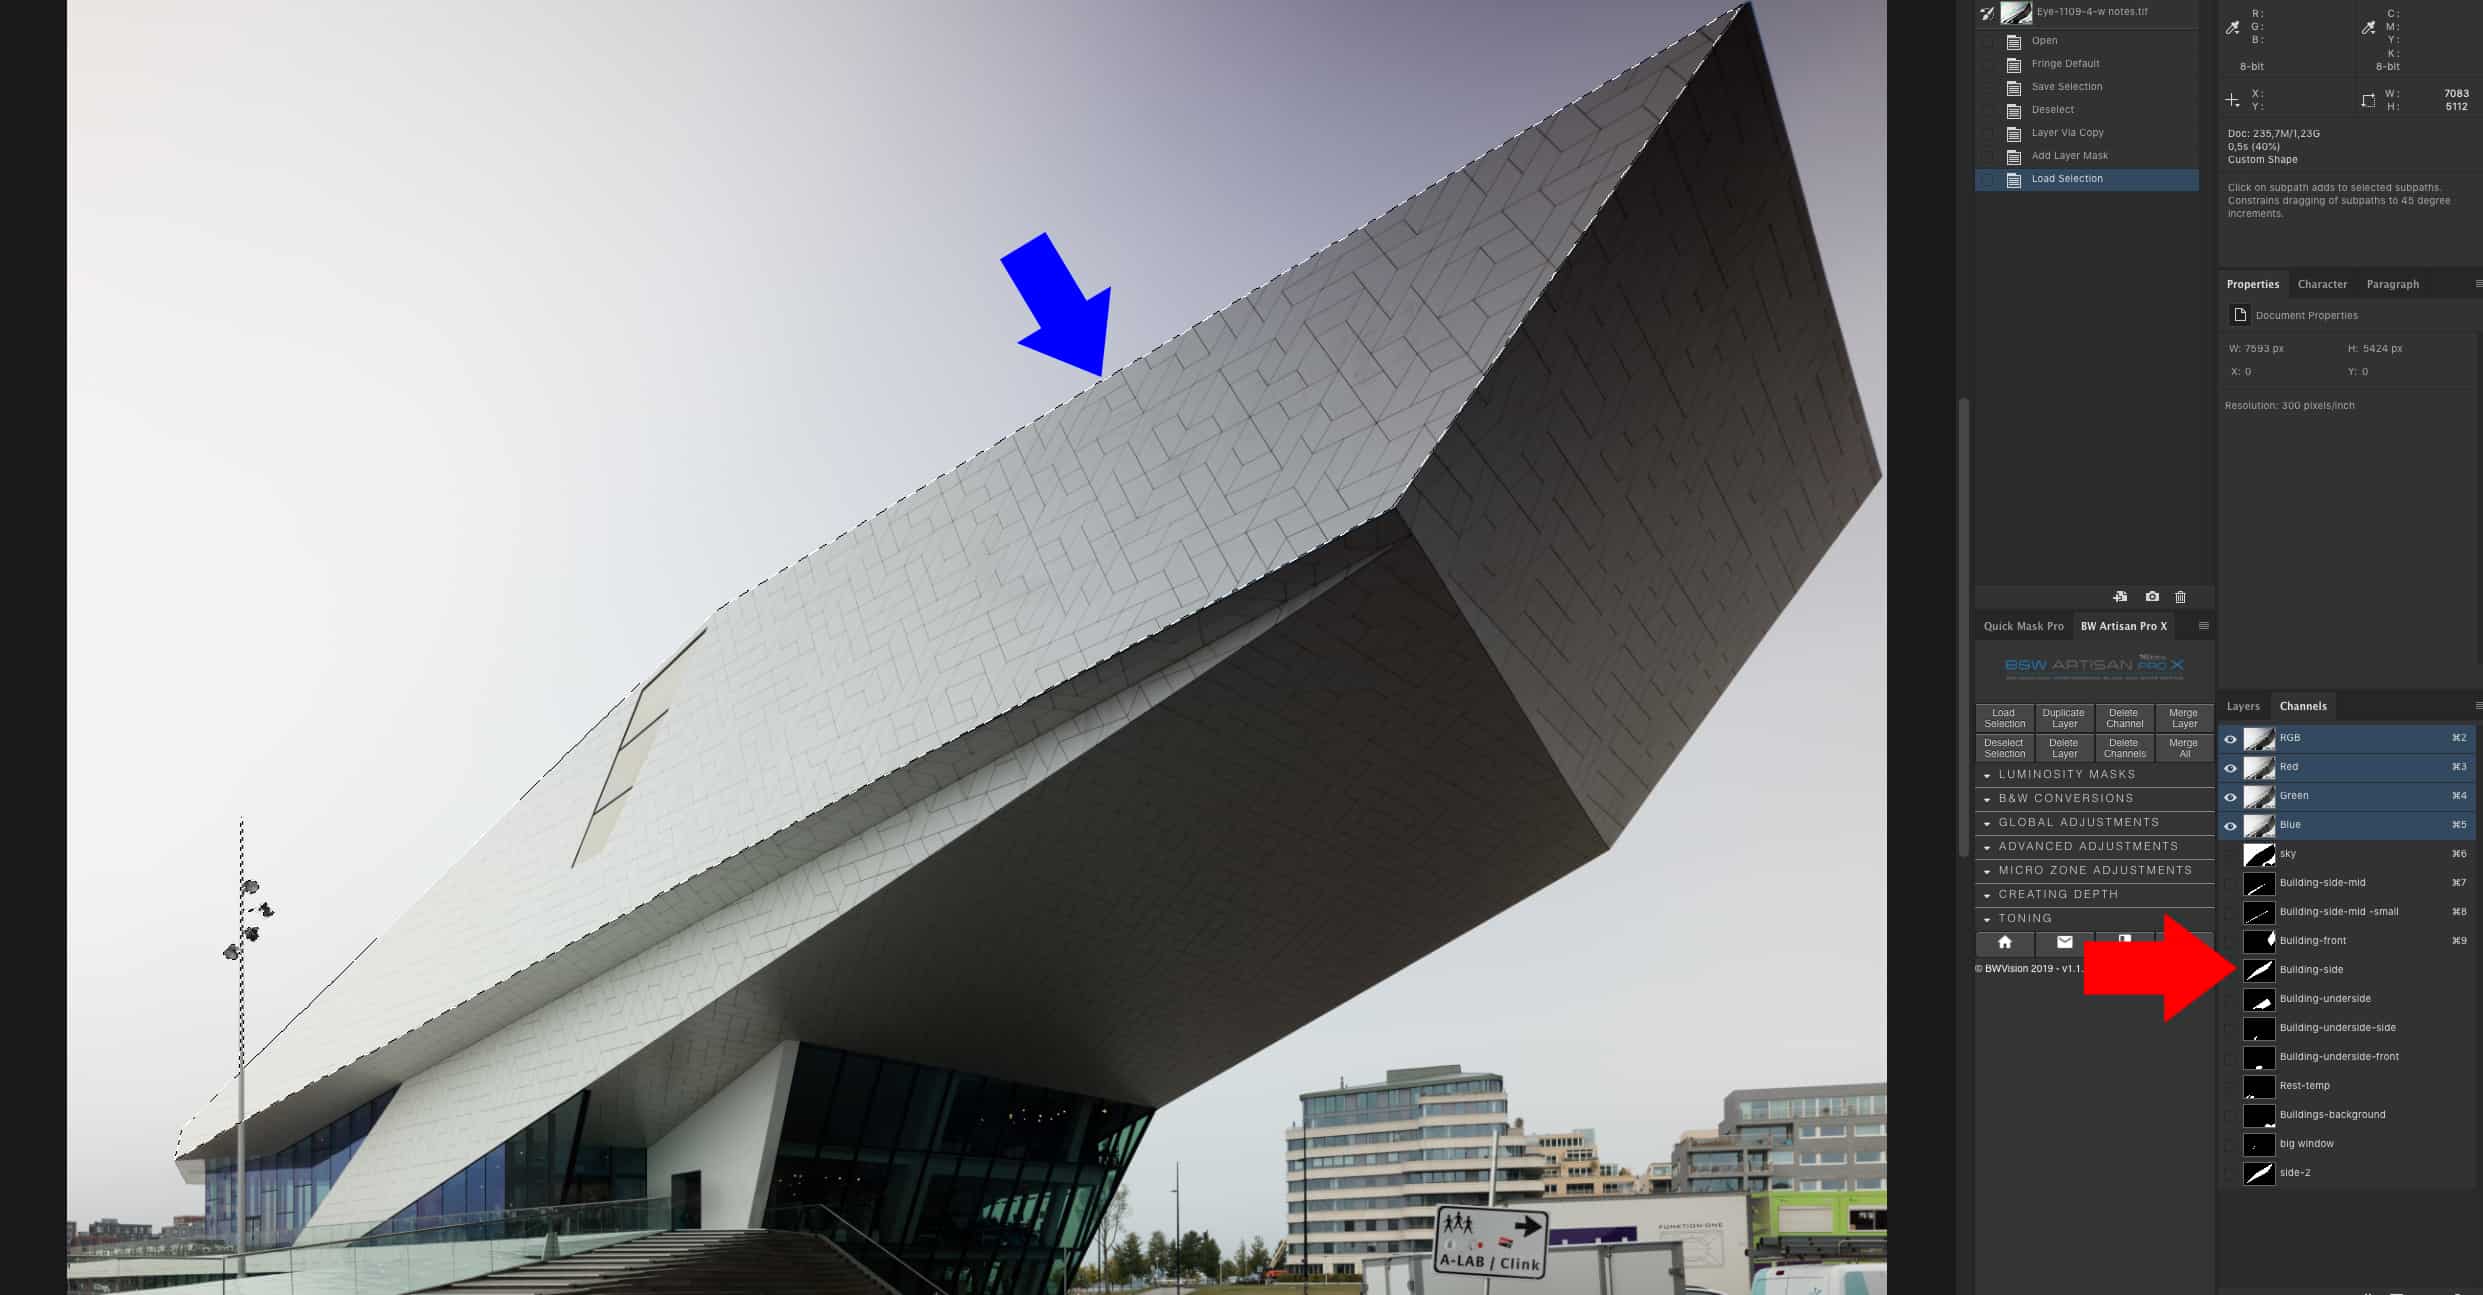
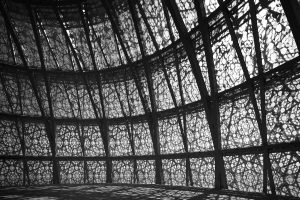
In the example below I’ve used a contrast-based method for the sky and outline of the building, like in most of my photos, then I used the color based method to mask the trees and foliage and then combined them all together in one Alpha channel.
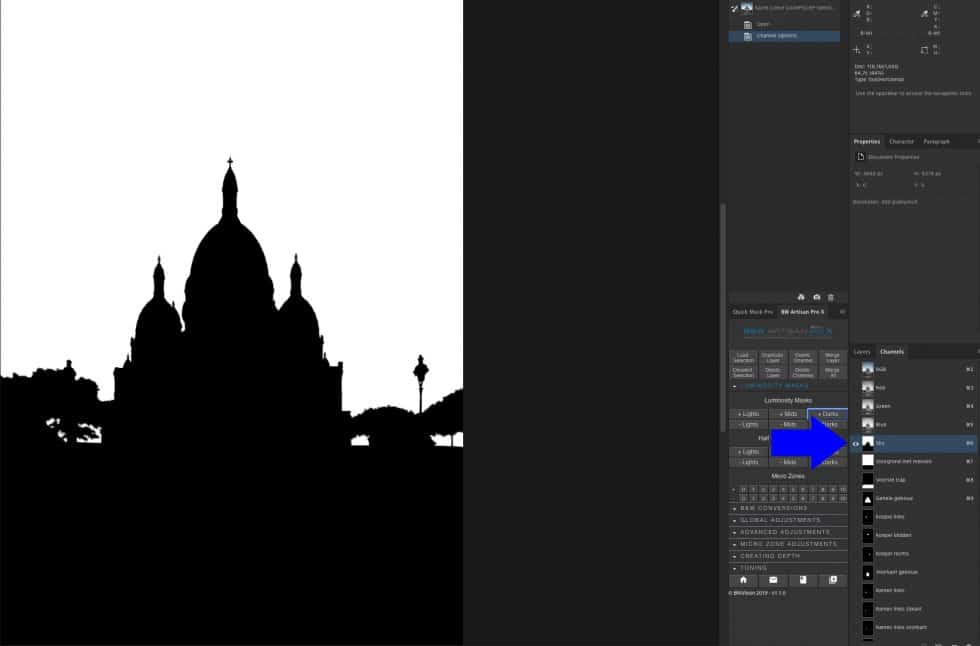
I always aim to have everything masked for roughly 95% using the contrast-based and color based method combined and then do the rest that cannot be masked using contrast-based method or color based method, with the pen tool with as most important instrument my eyes and my artistic judgment. Because you always have to ask yourself: do I really need that part selected or can I solve it in another more elegant and faster way? Too many times I see people creating masks of parts that actually don’t need to be masked or can do with a rough selection of an area.
MASK EDGES AND CONTRAST
Contrary to what most people think and do, I always make sure that my hard masks have softer edges.
When I look at masks and I have to assess them, then the accuracy of masking is obviously one important criterion, but not the only important criterion. Another often overlooked criterion is that hard masks of concrete objects should have a softer edge to allow for a natural transition to adjacent areas.
You won’t see the issue with hard masks that have hard and sharp edges if you don’t push the contrast too much in your editing. But if you’re like me and many other B&W fine-art photographers who like to push the contrast far beyond the point of what was actually there, then hard masks with hard edges will always result in light or dark fringing and small inconsistencies in the mask will be amplified.
Leonardo Da Vinci employed the technique of Sfumato to soften the transition between contrasting areas to increase the depth and to make it look more natural. And it does look more natural.
I’ve seen too many architectural photographs where it looks like the building has been superimposed on top of another photo, not because that’s what happened, but because the edges were too sharp and too contrasty.
It’s great to create surreal looking and high contrast fine-art photographs, it’s the style I love myself, but it looks amateurish if you make it look like you’ve made a composite photo out of one single photo simply because the edges are too contrasty and too hard and there’s no natural transition.
Rule of thumb: always try to make edges a bit softer for natural transitions, especially when you push the contrast between the object you’ve selected and the adjacent area. You will avoid not only the terrible halos but even better, you will make it look far more convincing and natural. Moving away from reality and creating surreal images, will only convince the viewer if you’ve made it look natural. As if it is really there.
Of course you could just go with hard edges in the mask and then correct it after the adjustments by cloning out any dark or light fringing and then soften it, or by simply using the smudge tool, but you save a lot of work by preventing the fringing in the first place. You can’t completely avoid it, and you will need to check it anyway, but the better your mask and the better the type of soft edge you’ve added to the mask, the better the chance you won’t need to correct it.
HOW TO SOFTEN THE EDGE
How much softening is needed around the edges, all depends on the size of the selection in relation to the size of the image: with larger selections in let’s say, 100MP photos, you will need more softening than in small selections in a 15 MP photo.
But here are a few guidelines:
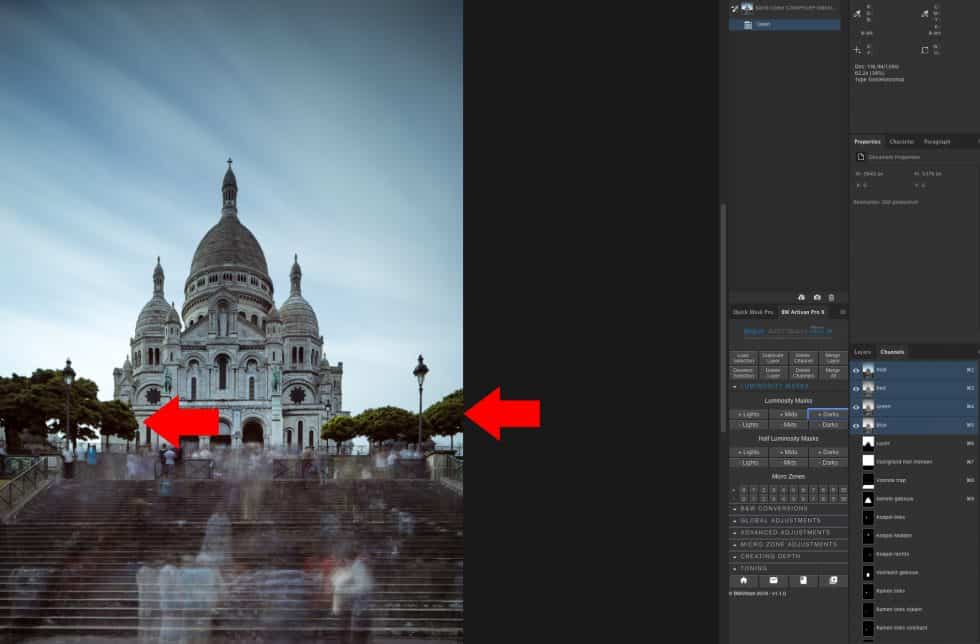
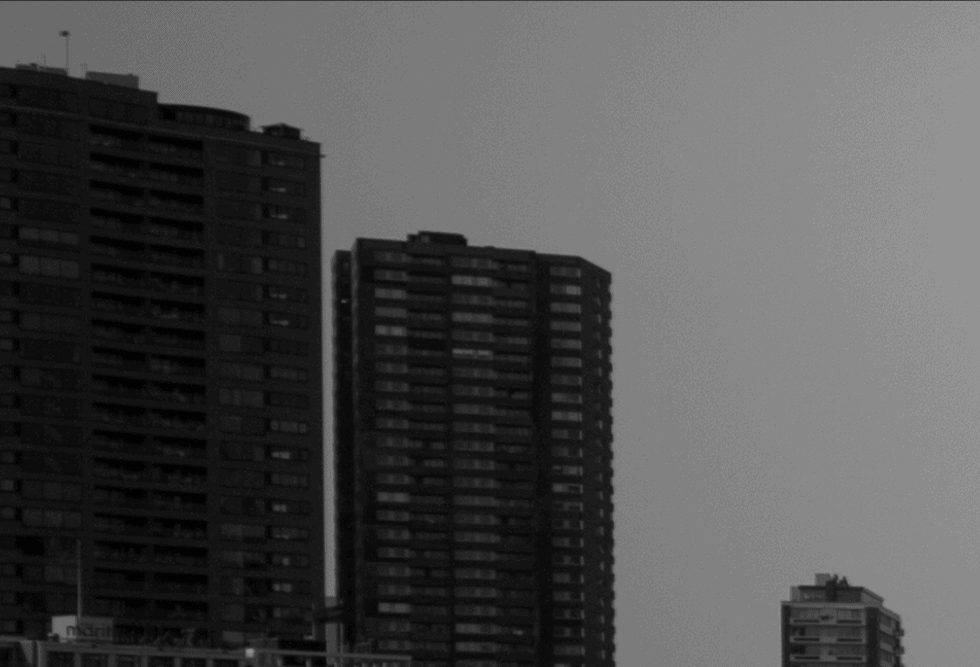
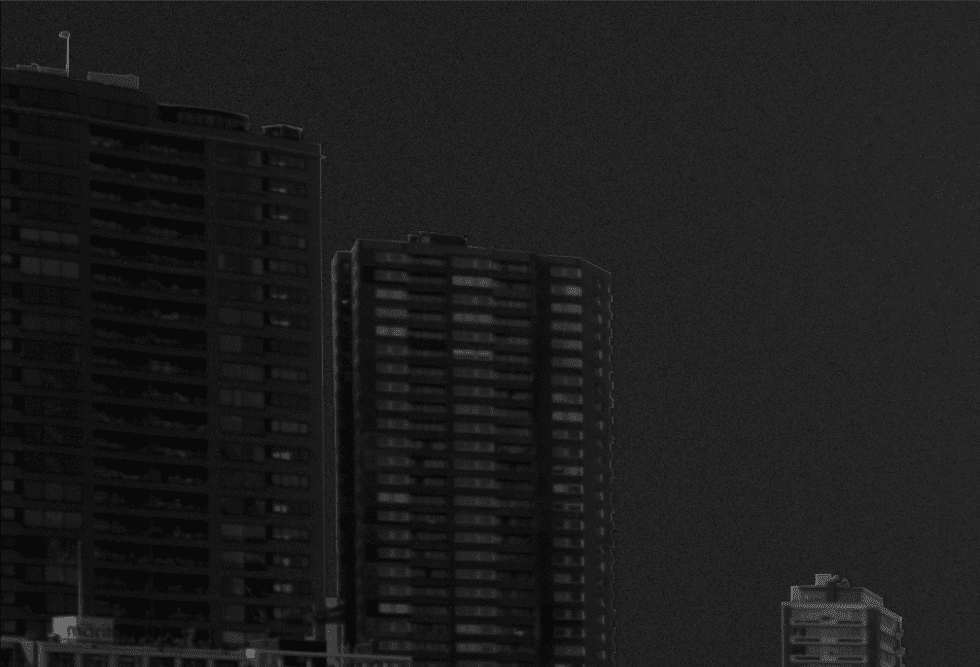
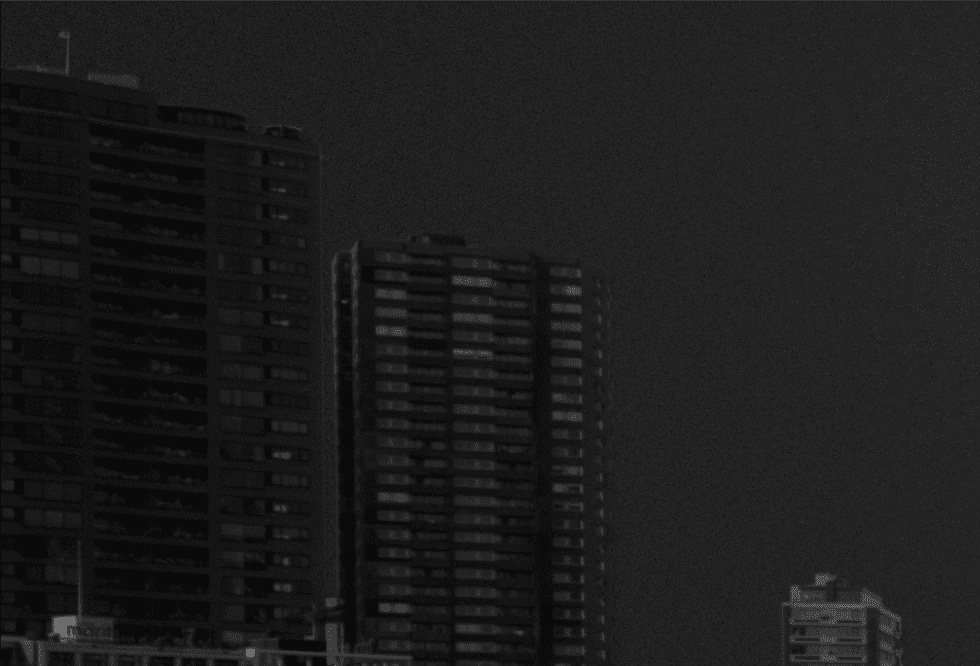
Depending on the size of the selection and the size of the image, and after I finished making a mask, I would load the mask as a selection and go to ‘Select and Mask’ in Photoshop. There I would use any value between 0.7 and 1.2 pixels for the feathering and at the same time shift the edge with anything between 15% and 38% to compensate for the shifted edge due to the feathering.
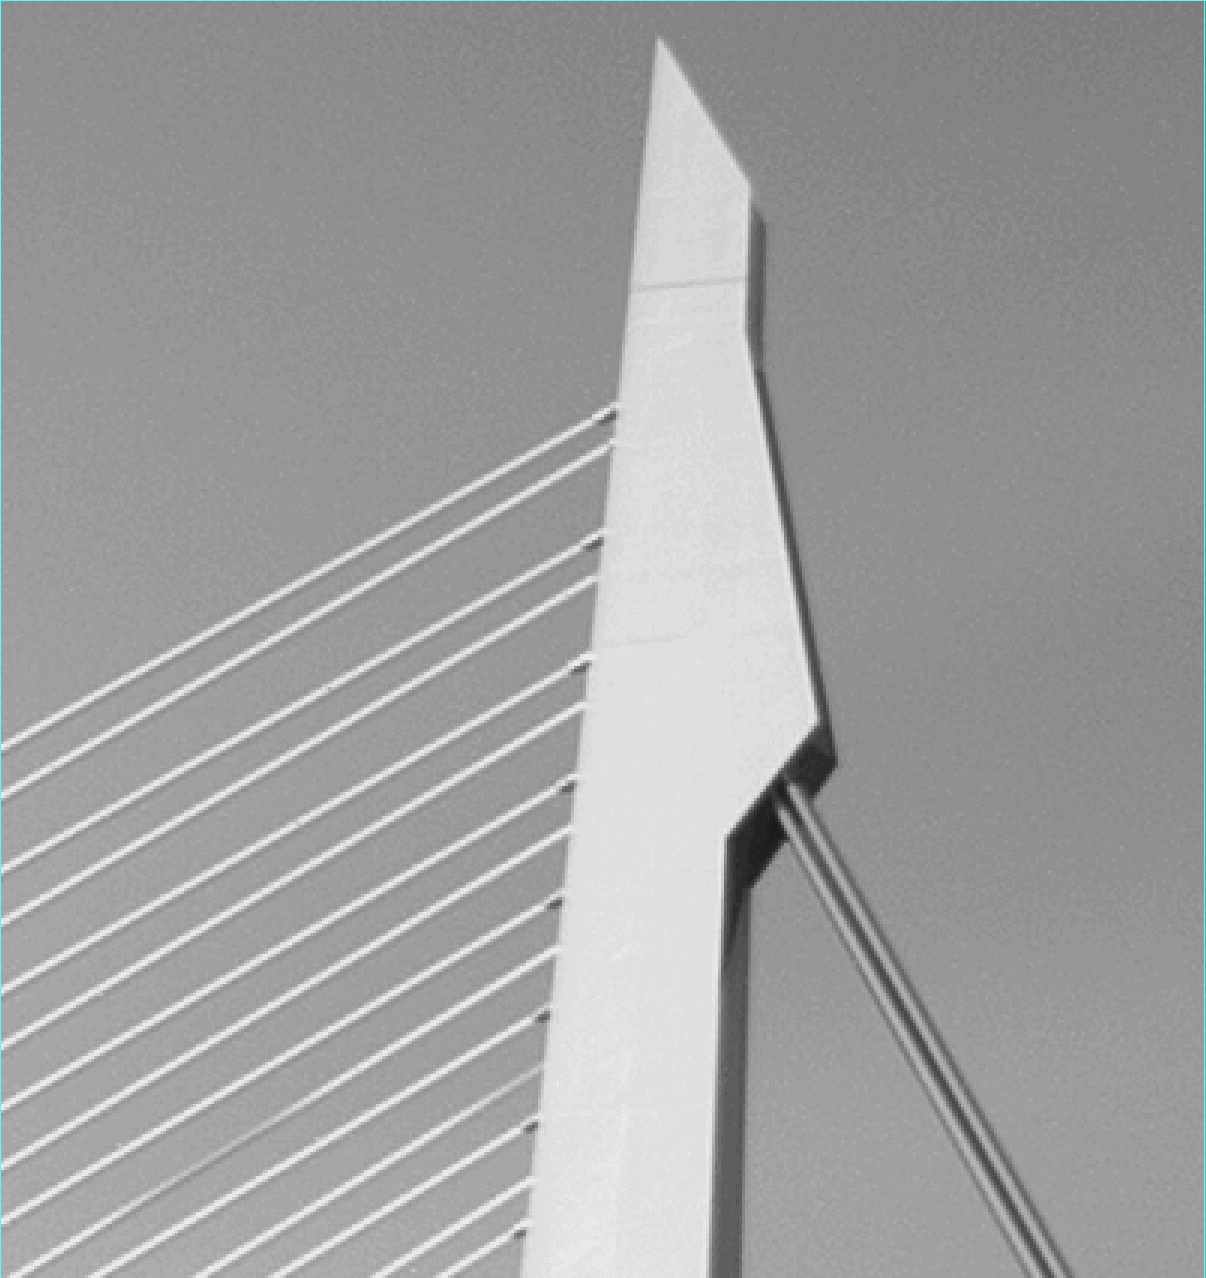

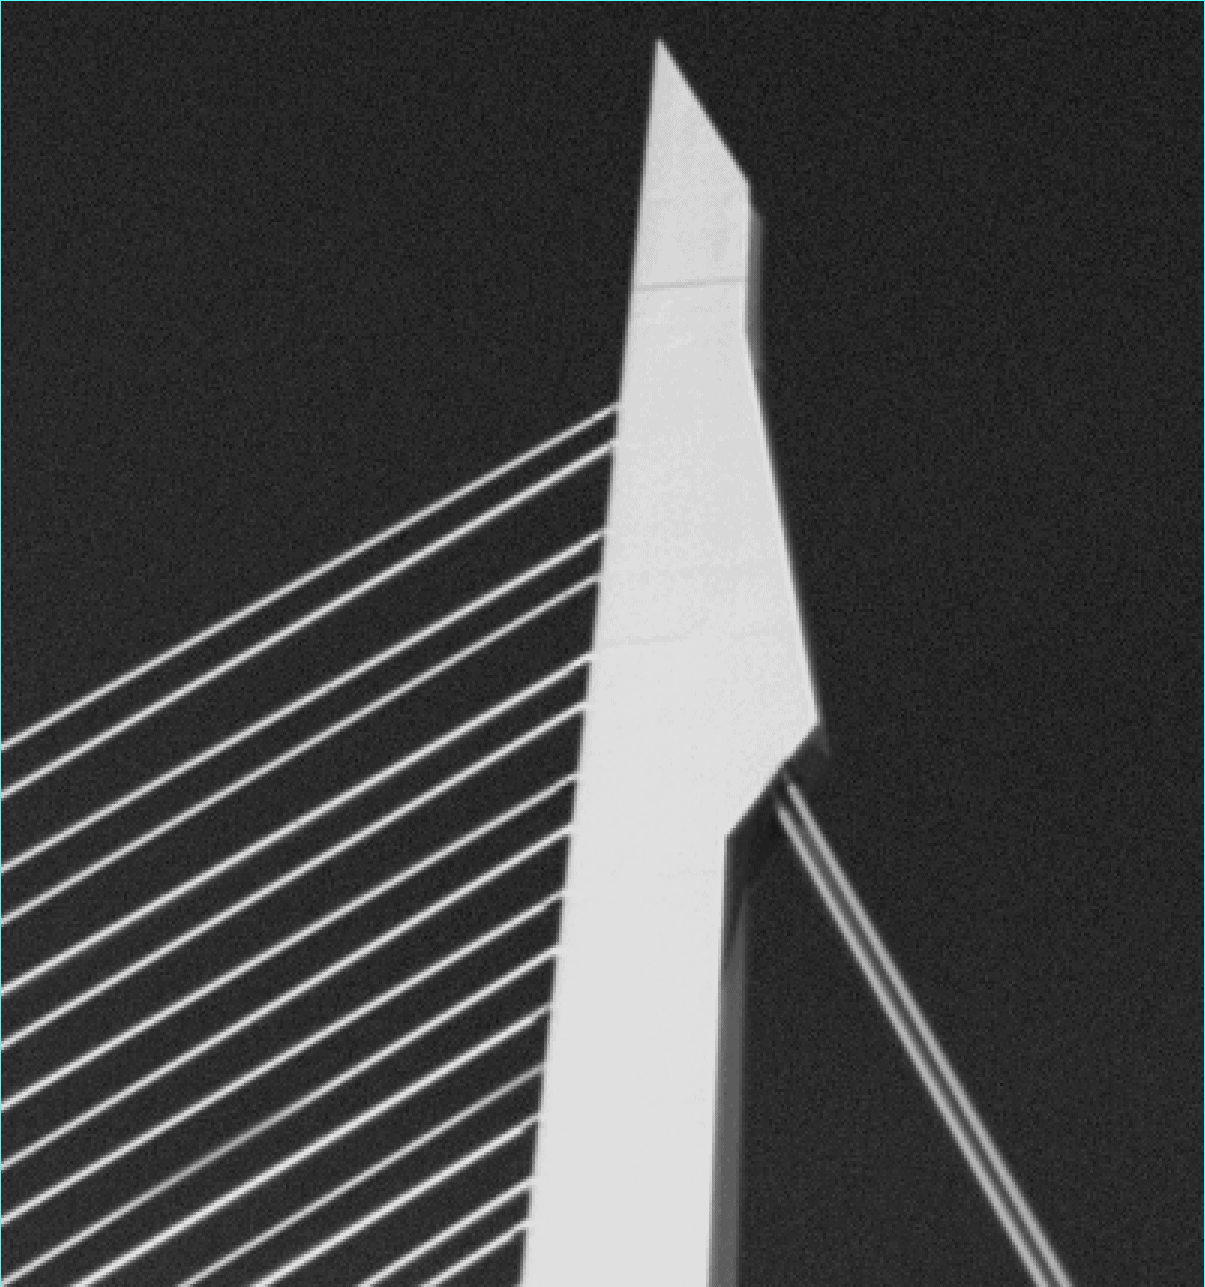
For the example images of the Erasmus Bridge above, I’ve loaded the selection of the sky, which was the largest selection of the photo. The photo was produced with a 22Mp Canon 5D mk III camera using a 24mm T/S lens. I used a feathering of 0.9 pixels with a shifted edge of +31%.
Just try to experiment with it and see what works best for you, but it always depends on the size of the selection and the image and to what extent you push the contrast in your photo. I would recommend going with the minimum amounts and then gradually add more feathering pixels or edge-shifting. But always start off from a finished and accurate mask. Softening the edge of a sloppy selection won’t make your photo and edit any better.
ONE MORE THING – NEW MASKING SERVICE
If you’re struggling with creating masks, or just don’t have the time and patience for it (I surely am one who has no patience for that or the time): as of September 6, 2019, there’s a new masking-service offering on my website store in collaboration with one of the largest and most reputable photo editing services in the world. They will create the masks while I advised and instructed them what fine-art photographers expect from masks. I will also be involved in random quality checks. More info in the next newsletter and website update.
ARTISAN PRO X UPDATE + NEW VIDEO
- There’s a major functional update for our B&W Artisan Pro X panel, that is a free update for existing users. It has 96 new presets and other improvements. More here.
- The B&W Artisan Pro X panel also comes with a new Artisan Pro X video tutorial on Youtube, discussing in-depth the Creating Depth and Restore features.
4 Responses
test
Thank you so much Joel, I still have lot to learn lots of about luminosity masking and Channels…Terima kasih banyak Joel
Thank you too Soelast, sama-sama:)
hello Joel, i just recently bought the bundles. and i cant find the panel inside photoshop. i can only see the older plugins like silverefex, topaz , tkpanel. please help. thanks